


WordPress is a well-designed open source platform for blogging, and can be used in conjunction with Dreamweaver for creating and editing WordPress themes.
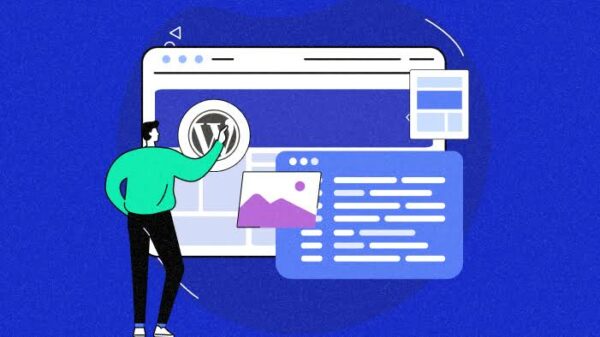
 WordPress is a well-designed, open source platform that has become a popular tool for bloggers due to its simple structure, as well as its ability to separate style from content. This means that you can edit the content of your blog without having to edit the theme and vice versa, making it easy to change the content and the appearance of the blog separately. Although WordPress itself doesn’t offer any built-in coding tools that allow you to make significant changes to a theme, you can use software such as Dreamweaver to create, edit and view WordPress theme files. If you have Dreamweaver, then you have all the tools you need to get started creating and customising your WordPress themes.
Here are some tips for editing your WordPress themes using Dreamweaver.
Getting Started
In order to view your live WordPress theme on your computer within Dreamweaver, you will first need to set-up a local web server, so install WordPress, and create a site within Dreamweaver with a properly configured testing server. It sounds like a lot of work for building a theme, however you only need to do all this once in order to edit multiple themes.
Installing the Local Web Server
The local web server you will need to install for WordPress is XAMPP for Windows, and MAMP for Mac OS X. This will set up your local PHP server environment, which is necessary for viewing WordPress theme files.
Installing WordPress
Installing WordPress is necessary to enable you to display the theme files properly. Visit http://wordpress.org/download to download the latest release of WordPress, then unzip the files and place the contents of the folder in the htdocs folder of your system, which was created when you installed the web server (XAMPP or MAMP). Follow the rest of the WordPress instructions and you will find yourself at the WordPress Dashboard. From there you can do all the things on your local computer that you can do on a remote server with WordPress, including creating and editing posts, downloading and changing themes, adding plug-ins, etc.
Set Up Local Dreamweaver Site
The next step is to set up a local Dreamweaver site using your WordPress theme. This site will act as a “chopping block” for your theme from where you will use the editing tools to change the presentation of your theme. Simply create a folder on your local drive and unzip your downloaded theme. You will now have all the components of your theme ready for editing in Dreamweaver and you can access both your local and remote theme files through here.
Get Your Blog Onto Dreamweaver
The next step is to get the complete code from your blog page into Dreamweaver in order to edit it. Open your remote blog in a browser and click on the ‘view’ menu. Click on ‘Source’ and you will see the source code for your blog. You will want to highlight all of the code, copy it, and then paste it into a new HTML document in Dreamweaver.
For more comprehensive tutorials, it is highly recommended that you take an adobe course that will provide more detailed Dreamweaver training for beginner bloggers. It seems quite complex at first, so having a one-on-one tutorial is invaluable if you want to become a proficient blogger.


Rene
February 27, 2012 at 2:47 am
Cool,
I’ve been wondering if it was possible to transfer WordPress to another platform for a while now.
I’m just starting to get my head around html code, and it annoys me sometimes how limiting some WordPress templates can be.
Tracyann0312
February 27, 2012 at 8:20 am
WordPress is one of the great tools that can use to increase the traffic we may have in our website. Thanks for sharing the idea on how to edit WordPress themes with Dreamweaver it can help many marketers to make their theme look more presentable. I love your site for giving new ideas in different topics.
Hanns
February 27, 2012 at 2:01 pm
Thanks for sharing. I ahve wondered if it was possible to customise a theme with a tool like dreamweaver. I will give it a try and see if I can produce something I like…
Alan64
February 27, 2012 at 4:53 pm
Thank you for the post. I’ve never considered Dreamweaver for such a purpose but it is always interesting to try something new)
Nicholle Olores
February 28, 2012 at 1:49 am
I am thinking about this recently on how to edit WordPress themes in dreamweaver and I never thought that it would be possible. I am happy to know about it.
stella
March 2, 2012 at 4:48 am
Dream weaver is really nice and you just solve a big issue in that i was being stuck
Maja
March 3, 2012 at 4:34 pm
It is really one of the good tutorial to edit the wordpress themes by using Dreamweaver. I often want changes in WordPress themes and now my problem has solved.
Danny
March 6, 2012 at 4:19 am
Thanks for your explanation.
I would really like to edit my wordpress theme with dreamweaver, but after reading the explanation I am afraid that I don’t understand it well enough to try it. Cuz I don’t want to ruin my money sites.
Maybe some day I will know enough.
Bishwajeet
March 10, 2012 at 10:04 pm
Never thought that its possible to edit wordpress themes with dreamweaver. Now will give it a try by myself
Seniorinnen
March 12, 2012 at 3:18 am
Thanks a lot actually i work in joomla but i need edit themes for wordpress for use it and forget joomla jeje 🙂
Shine
March 13, 2012 at 7:08 pm
This is a good tip. I just have to learn how to use Dreamweaver first. 🙂
phanmemcrm
March 14, 2012 at 2:11 pm
Great tutorial for me…. this is how I like to work… wysiswg and visually. Code is not my thing so this tutorial really helps. Thanks!
spinx
March 16, 2012 at 10:41 am
Your information is really good to change wordpress theme into Dreamweaver. The important additional steps are that, you have to set server preference for word-press and copy all files into HTDOCS folder. Then, setup your blog on Dreamweaver, check testing server, save server setting and open index file into Dreamweaver.
CB540A
March 16, 2012 at 12:38 pm
Very well written. Very unique, impressive, and helpful information. Thank you for sparing your time to write all this in detail
Celia
March 19, 2012 at 11:00 am
I constantly make changes to my WP themes and I worked with Dreamweaver in order to get the exact look that I wanted but I prefer to use a faster method for that. I make the design and layout first in Lubith, which is a very flexible, user-friendly, helpful and fast WP theme generator and then add the subtle touches from the code. It saves me a lot of time and the result is excellent.
Roy Fernandez
May 9, 2012 at 12:47 pm
I hated those default themes and I’m going to try this. Thanks! Great tutorial!
Vtunnel
May 28, 2012 at 5:32 pm
I have start learning wordpress, but not able to edit its theme, but from this post I and sure that I will do it easily. Thanks for good informative post.
Michael
September 15, 2012 at 9:36 am
WAMP is also a very good server option for Windows machines.
Jeff
April 3, 2013 at 3:07 pm
Growing up with expressions web, I initially found Dreamweaver difficult to use. But after a while of trial and error, I find it is not that difficult.