


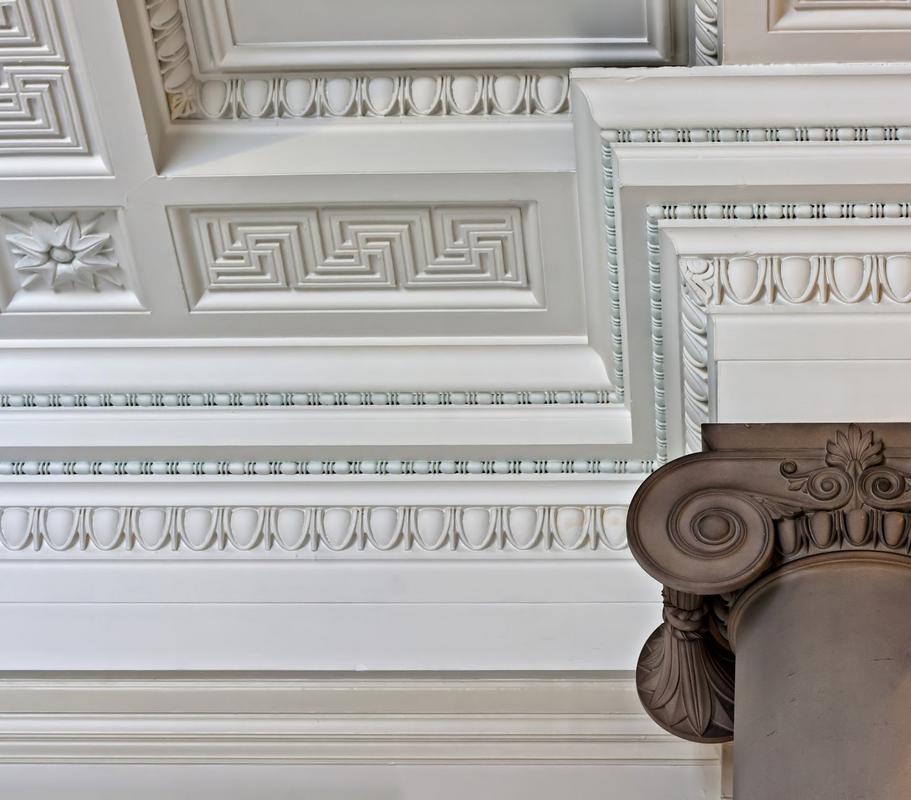
No matter how big or small our houses are we always love to make them as beautiful as we can. Along with walls, floors, doors and windows, ceilings are one of the most noticeable parts of our homes. Therefore, we never let go any opportunity when it comes to decorating our ceilings with decorative plaster products & plaster cornices.
Decorating the ceiling and attached corners with plaster products and cornice will definitely give your room an amazing look, but the question is are you going to execute the task on your own or consider professionals to work on your instruction? If you have enough time and all required tools, then applying your skill will not be a bad idea. Go through this article and learn some important things about decorating ceiling with plaster products and cornice.
Keep Tools Ready
If you come with all the tools required for this job, it will be easier for you to execute the things in a planned manner. The task of fitting decorative plaster products & cornices on your ceiling will require right measuring, cutting, and screwing with the right tools. Here is the list of tools that will make your job easy.
- Saw
- Mitre box
- Adhesive
- Pencil
- Ruler
- Hammer
- Nails
- Filling tool
- Sanding sponge
- Water
- Paintbrush
Time to Install the Plaster Cornice
Once you have collected all the equipment to install decorative plaster products & plaster cornice in your room, start with the corner that is visible from the entrance point. Take the pencil and draw a visible line around the areas you want to install the cornice. Please, do not follow the ceiling line, as they may not be at the right level.
Now, take small pin nails and tap one within a gap of 500mm on the wall. However, you can also use wooden screws for better support of the cornice.
Measure the Length and Fix the Cornice
Once you have measured the length of the area, you want to cover with decorative plaster products & plaster cornice, now it is turned to cut the cornice precisely, and make them ready for installation. If you find that the 2 pieces of cornices do not joint perfectly, you can trim a bit for a desirable finish. You can use adhesives to cover the small nail holes on the wall.
In order to get the perfect finish, apply a thin layer of adhesive and join the coving with the next piece. The adhesive between two coving pieces will hold them tightly and prevent cracks. You can repeat the same for your remaining tasks. Remember that adhesives can be used for fitting plaster cornices or coving, but if they are made of polystyrene or plastic, you must use high-quality silicon adhesives.
Paint the Coving and Cornices
Decorative plaster products & plaster cornice are available mostly in white but you can paint them with your favorite color, they look great on the wall and ceiling. It is better to touch the coving and cornice 24 hours after the installation, as adhesives require time to turn dry.
There is nothing wrong with painting plaster coving and cornice, but before painting, you should know that painting is recommended for plaster ceilings and mouldings. Do not forget to apply oil-based paints or sealer on the plaster products or cornice to fix issues like cracking a discoloring.

Conclusion
The installation of plaster cornice on the wall and ceiling requires the hand of professional experts, but if you are a DIY (Do It Yourself) enthusiast or have some knowledge about how to fit decorative plaster products & plaster cornice on the walls, you can try it on your own.