CyanogenMod is the biggest name in Root Town, and its new installer is like a welcome pack for anyone moving in, containing everything you’ll need. CyanogenMod Installer doesn’t care whether or not you’ve rooted your device beforehand, or if you’re already sporting a custom ROM - it scans your device, works out what it needs to do and then installs CyanogenMod, requiring you to do nothing more than follow some simple instructions.
It’s a fantastic tool, and though it’s a shame that it was pulled from the Play store (for encouraging users to void their warranties by getting rid of the default manufacturer’s OS), it’s still available to anyone with a browser. All you need to do is boot up your PC, grab your ‘droid and then hit a download link on each device.
The Installer comes in two parts: one for Android and one for Windows. Once the two parts are talking to each other, your computer will then download all the files before passing them across, via USB, to your Android device. Your device will then reboot into Download mode, and you’ll see it restart a few times, but soon enough it will boot up again into a brand-new interface. If you get into a little trouble at any stage, or find that the Installer doesn’t work properly for you, head over to the CyanogenMod Installer support page: http://wiki.cyanogenmod.org/w/CyanogenMod Installer.
1. Back up your data
The first thing to do is make sure that you’ve backed up your files and data using an app like Titanium Backup or Nandroid Manager, both free on the Google Play store. After that, head into your Settings app and then tap Security. Scroll down to find Enable Unknown Sources and then give it a tick.
2. Download the Android Installer
Now open up your browser and head to get.cm/app. Itâs a direct download link from the official CyanogenMod download page, so you can safely accept the warning to begin downloading the file. Once itâs finished, youâll receive a notification. Tap it to continue.
3. Begin installation
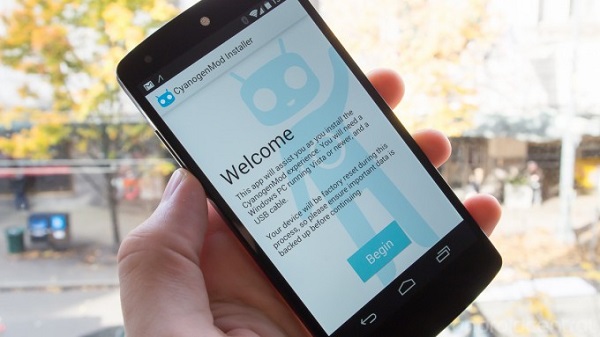
The first thing you’ll see is a confirmation screen, where you need to grant the app permissions. Tap Install, and then tap Open once the installation has finished. The CyanogenMod Installer app will then load up, displaying a welcome message with instructions. Tap Begin once youâve read it all.
4. Follow the instructions
First, you need to enable USB debugging, and an image shows you which section of your Settings app it should be located in. When you tap Continue, you’ll be taken straight to that screen, and after you tick Enable USB Debugging you’ll return to the Installer.
5. Finish and switch
Next up is enabling PTP mode, and you will again be shown where that setting is located. Hit Continue and make the setting. With that done, you’ll be prompted to continue the process with the CyanogenMod Windows Installer. Leave your device on that screen and switch over to your PC.
6. Download the Windows Installer
Fire up your browser and go to beta.get.cm, which is another official CyanogenMod page. Youâll see a page of instructions, so scroll down to Step 4 right at the bottom. Click on the underlined link to download the companion installer, which will take care of almost everything from here.
7. And continue
Run the Windows Installer once it’s downloaded. After it opens up, it will then take a little time to update itself first. Once that’s finished, you’ll be asked to temporarily disable your antivirus program, so that it doesn’t interfere with the installation. Do so; just remember to enable it later.
8. Plug in your Android device
Next, you’ll be asked to connect your device to your computer with a USB cable. Once you’ve done that, tap OK on your device to give your computer permission to connect. After that, the Windows installation will continue (and you can put your phone down again).
9. Start installing CyanogenMod
With everything ready to go, CyanogenMod Installer will now download the CyanogenMod ROM plus all the system apps. This can take a while, but eventually it will finish and youâll see a reminder to back up all your files and data. If you’ve done so, hit Install.
10. Leave it be
Your device will now reboot into Download mode, which means that it is waiting to receive instructions from your computer. Fortunately, the installer takes care of everything for you - no more Odin.
Sit back, wait for the ‘finished’ message on your computer, then check out your new device.
Interested in reading more of such Tips on Android? You can read them on theandroidtips.com blog.

3 Comments
Leave a Reply
Cancel reply
Leave a Reply
This site uses Akismet to reduce spam. Learn how your comment data is processed.


Gautam
February 4, 2014 at 9:09 am
Hey I have heard that rooting always go bad and Most of them don’t know how to revert back.So can you lead me in this direction?
Sahil
February 4, 2014 at 3:18 pm
Hi Brandon,
Once I was trying to root my phone, and messed up everything. From then, I never even think of rooting my phone. Though, if you know how to do it, then you can go for it.
James
March 8, 2014 at 5:19 pm
I have an Android phone. It’s my first time hearing about CyanogenMod ROM. Can you explain further the benefits of rooting my phone into this ROM? Thanks.